· 4 min read
Run your Android CI in Google Cloud Build
Android emulators in Docker

You don’t need travis-ci or bitrise to spin Android virtual machines that can build your Android apps. Follow these steps and benefit the flexibility and scalability of the Google Cloud Platform.
1. Fork and clone the tutorial repo
You will need to fork the repo first to have rights to install github triggers (see below):
git clone https://github.com/martinbonnin/android-cloud-build-sample
If you’re only interested in building the docker image, just clone the origin repo:
git clone https://github.com/dailymotion/android-cloud-build-sample
2. Create a new Google Cloud project and enable Cloud Build API
Go to https://console.cloud.google.com and create a new project. The project for this tutorial is named cloudbuildsample.
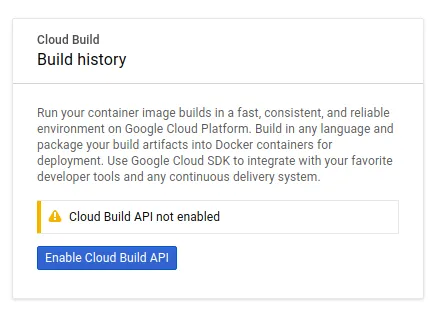
Then, enable Cloud Build API from your project page (https://console.cloud.google.com/cloud-build/builds?project=[PROJECT_ID]) 
3. Create your docker cloud-builder image and upload it to the Google container registry
# If you haven't already, install gcloud from these instructions:
# https://cloud.google.com/sdk/install
cd android-cloud-build-sample/cloud-builder
gcloud auth login
gcloud config set project cloudbuildsample
gcloud builds submit --config cloudbuild.yaml
# You now have a docker image with gradle and the android SDK
# uploaded to the google container registry
The docker file is where the magic happens. It describes how to build a docker image based on a pre-existing base image.
From the base image, add the android SDK:
FROM gcr.io/cloud-builders/javac

# Install Dependencies
RUN apt-get update \
    && apt-get install -y wget zip unzip \
    && mkdir -p /opt/android-sdk-linux

ENV ANDROID_HOME /opt/android-sdk-linux

# Download Android SDK tools
RUN wget -q "https://dl.google.com/android/repository/sdk-tools-linux-4333796.zip" -O sdk-tools.zip \
    && unzip -q -d $ANDROID_HOME sdk-tools.zip \
    && rm sdk-tools.zip

ENV PATH $PATH:$ANDROID_HOME/tools/bin

# Install Android SDK components
RUN echo y | sdkmanager --install 'platforms;android-27' "build-tools;27.0.3" "platform-tools"
You can obviously tweak what SDK components you need. If you’re compiling for API level 28, install platforms;android-28.
4. Speedup: cache your .gradle files !
This is where having lower level access to the infrastructure running the images comes in handy. You can tell Google Cloud Build to fetch a previous version of the gradle cache. Not only does this speed up the build but it makes it more reliable when maven, jcenter or any other hosting provider goes down. This unfortunately happens often and it’s frustrating to see a failed build just because dependencies fail to download.
In order to secure the build, we’re going to save the gradle cache in a gs://gradle_cache bucket in Cloud Storage. Create the bucket in cloud storage and add the gradle-build wrapper script to your image:
# Install the wrapper script
COPY gradle-build /bin/
gradle-build takes care of unziping/ziping the contents of the gradle cache:
# unzip command might fail the first time if cache.zip does not
# exist. That's okay
unzip -o -q cache.zip
./gradlew $@
status=$?
zip -qr cache.zip .gradle
echo "Exit status is: $status"
exit $status
5. Create the github triggers
Tell Google Cloud build to start a build on every push to your Github repository.
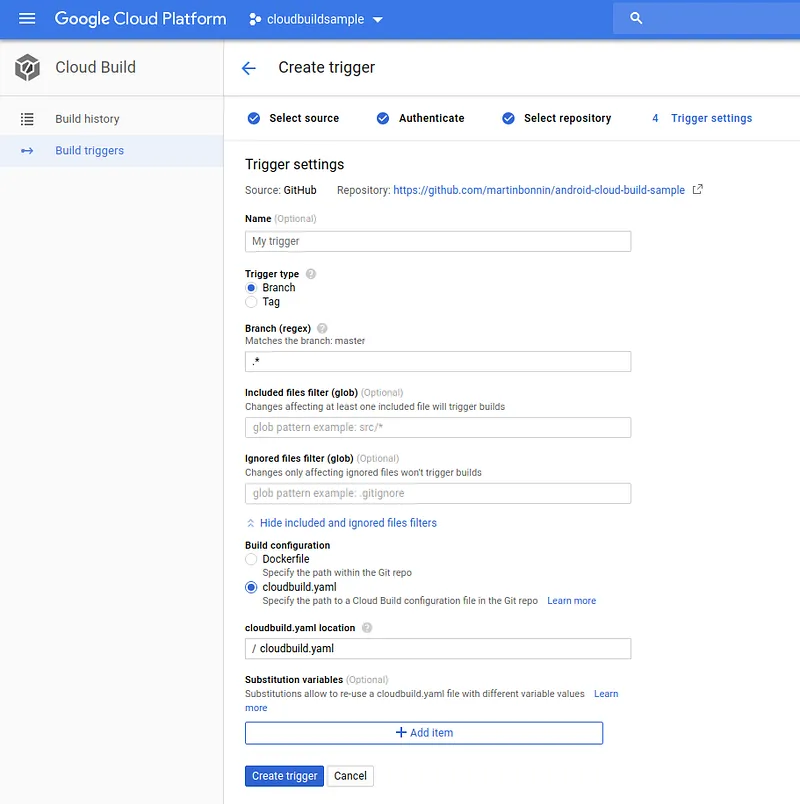
Go to the triggers page (https://console.cloud.google.com/cloud-build/triggers?project=PROJECT_ID) and add a github trigger, specifying the cloudbuild.yaml file at the root of the repo as config file: 
cloudbuild.yaml defines what builder images to use and their parameters. They all share a common persistent /workspace directory which is also the working directory:
steps:
  # get the cache from cloud storage
  - name: gcr.io/cloud-builders/gsutil
    args: ['cp', 'gs://gradle_cache_$PROJECT_ID/cache.zip', 'cache.zip']
  # build the app
  - name: 'gcr.io/$PROJECT_ID/android-builder'
    entrypoint: 'gradle-build'
    args: ['-g', '.gradle', 'assemble']
  # push the cache to cloud storage
  - name: gcr.io/cloud-builders/gsutil
    args: ['cp', 'cache.zip', 'gs://gradle_cache_$PROJECT_ID/cache.zip']
6. That’s it, you’re done !
Next time you push something to your repo, Google Cloud Build will build it for you:  Yay ! All Green !
Wrap up
Pros
- Per-minute pricing. There is no extra cost if no-one is pushing during the weekends.
- 2 hours of free build time/day for small projects (including private projects).
- Google Cloud scale. You can use up to 32 CPUS/28GB RAM machines if you really want to.
- Complete control of your docker images and the build process.
- Easy integration with other Google Cloud products. Storing artifacts in Cloud storage is a matter of adding a new step.
- You can cache your
.gradledirectory!
Cons
- We didn’t find a solution that automatically displays the status of pull requests. You’ll most likely have to set up the status hook handlers yourself.
- It’s not possible to start multiple builds for the same commit like Travis CI build matrices.
- There’s a bit of overhead to setup and maintain everything.
In the end, it really depends on your needs. If your existing CI isn’t broken, there’s no need to fix it. If you want to fine-tune your images, build times or bills, Cloud Build provides that flexibility. Hopefully the platform will continue to improve in the future! By Martin Bonnin on August 28, 2018.
Exported from Medium on November 9, 2024.